xCDAT on Jupyter and HPC Machines#
xCDAT should be compatible with most high performance computing (HPC) platforms.
In general, xCDAT is available on Anaconda via the conda-forge channel.
xCDAT follows the same convention as other conda-based packages by being installable via
conda. The conda installation
instructions in this guide are based on the instructions provided by
NERSC.
Setup can vary depending on the exact HPC environment you are working in so please consult your HPC documentation and/or HPC support resources. Some HPC environments might have security settings that restrict user-managed conda installations and environments.
Setting up your xCDAT environment#
Ensure conda is installed#
Generally, the installation instructions from the Installation
page can also be followed for HPC machines. This guide covers installing Miniconda3 and
creating a conda environment with the xcdat package.
Before installing Miniconda3, you should consult your HPC documentation to see if
conda is already available; in some cases, python and conda may be
pre-installed on an HPC machine. You can check to see whether they are available by
entering which conda and/or which python in the command line (which will
return their path if they are available).
In other cases, python and conda are available via modules on an HPC machine. For
example, some machines make both available via:
module load python
Once conda is active, you can create and activate a new xcdat environment
with xesmf (a recommended dependency):
conda create -n <ENV_NAME> -c conda-forge xcdat xesmf
conda activate <ENV_NAME>
Note that xesmf is an optional dependency, which is required for using xesmf
based horizontal regridding APIs in xcdat. xesmf is not currently supported
on osx-arm64 or windows because esmpy is not yet available on these
platforms. Windows users can try WSL2 as a workaround.
You may also want to use xcdat with some additional packages. For example, you can
install xcdat with matplotlib, ipython, and ipykernel (see the next
section for more about ipykernel):
conda create -n <ENV_NAME> -c conda-forge xcdat xesmf matplotlib ipython ipykernel
conda activate <ENV_NAME>
The advantage with following this approach is that conda will attempt to resolve dependencies (e.g., python >= 3.8) for compatibility.
If you prefer, you can also add packages later with conda install (granted that
conda is able to resolve the compatible dependencies).
Adding an xcdat kernel for use with Jupyter#
HPC systems frequently include a web interface to Jupyter,
which is a popular web application that is used to perform analyses in Python. In order
to use xcdat with Jupyter, you will need to create a kernel in your xcdat conda
environment using ipykernel. These instructions follow those from
NERSC, but
setup can vary depending on the exact HPC environment you are working in so please
consult your HPC documentation. If you have not already installed ipykernel, you can
install it in your xcdat environment (created above) with:
conda activate <ENV NAME>
conda install -c conda-forge ipykernel
Once ipykernel is added to your xcdat environment, you can create an xcdat
kernel with:
python -m ipykernel install --user --name <ENV NAME> --display-name <ENV NAME>
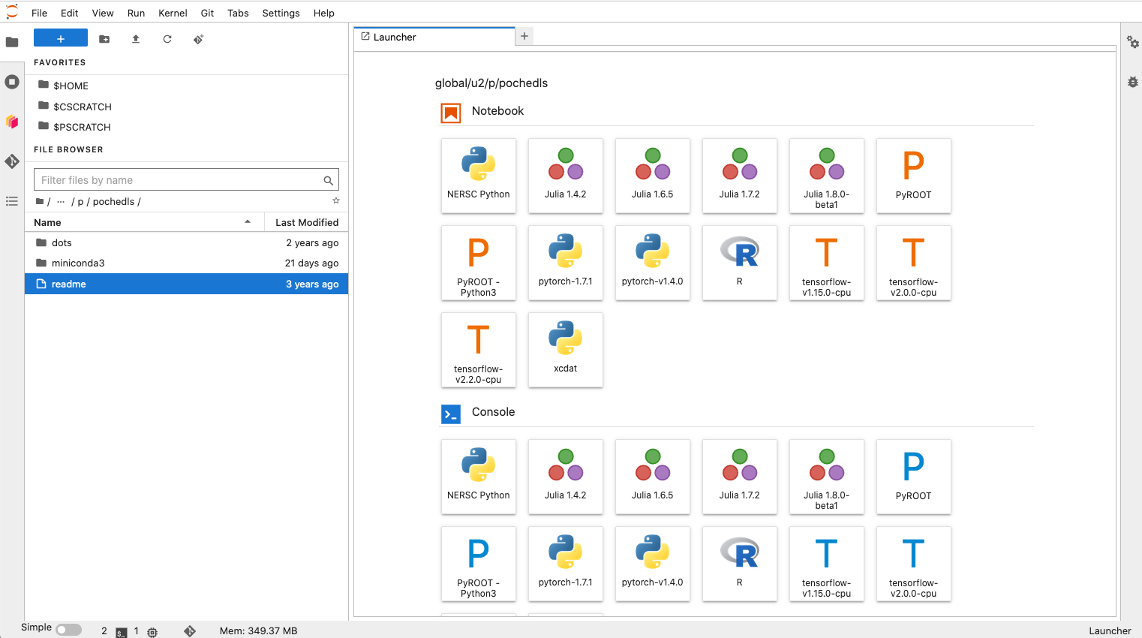
After the kernel is installed, login to the Jupyter instance on your HPC. Your xcdat
kernel may be available on the home launch page (to open a new notebook or command line
instance). This launcher is sometimes accessed by clicking the blue plus symbol (see
screenshot below). Alternatively, you may need top open a new Notebook and then click
“Kernel” on the top bar -> click “Change Kernel…” and then select your xcdat
kernel. You should then be able to use your xcdat environment on Jupyter.

